||Production|Heading|||
Production began on Saturday April 10th. Altogether there were ten production days.
Out With Dad has been filmed in full high definition 1080P, 24fps. The production camera is the Canon Rebel T2i, a DSLR. The original intention was to rent a high-def video camera for each or our three production weekends, but the cost to purchase this camera ended up being less than the rental budget, including two lenses. The lenses include an 18-55mm f/3.5-5.6 zoom lens (included with the camera) and a 50mm f/1.8 lens. The results of this camera have been very satisfying. In addition to saving costs of renting, we were able to open up the production schedule to go beyond just three weekends. One scene, filmed on the subway, was shot late one Tuesday night when we figured it would be least busy. If we had opted to rent, our limited budget wouldn’t have allowed for this one-off night of filming.
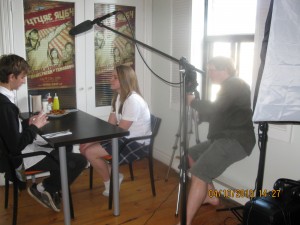
The bright sun coming from the window required a faster than desired shutter speed of about 1/100sec. Whereas 1/30 to 1/50 is preferred.
On the first day of production, some of the cast members appeared to be unsettled, and even unconvinced, when it was revealed that a digital stills camera was being used as our motion-picture camera. After reviewing some of the footage, everyone was won over.
As great an actor as Corey Lof is, he didn’t hide his scepticism very well! The greatest thing about this camera is the ability to use lenses that capture film-like images, including a shallow depth of field – something of which this filmmaker is a big fan of. Another advantage to filming with a DSLR is how unassuming it is.
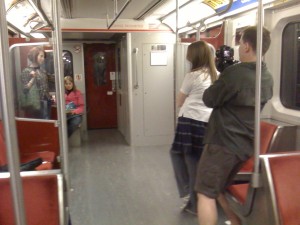
Going back to that subway scene, it was filmed without disturbing other riders or subway operators. A bigger traditional film/video camera would have drawn lots of attention which could have caused lots of distractions and/or interruptions. In fact, I don’t think anyone knew we were filming.
In episode four there is an outdoor night scene. This was lit almost exclusively by Christmas lights, and a tungsten porch light about 3-4m away from the actors. This camera has an ISO range of 100-6400, this night scene was filmed at 3200 ISO. It performed admirably with very little image noise.
I tended to use the 50mm lens most often because the aperture could be opened to f1.8, causing a very narrow depth of field. A polarizing filter was occasionally used as a neutral density filter to cut down the light whenever necessary. When that wasn’t available, I’d favour a faster shutter speed in order to achieve that shallow depth of field. Unfortnatly I’m not a fan of that look. For instance, take a look at Corey’s movement, particularly his hands, in episode two at around 3:20-3:40 it’s very stuttered or choppy feeling which I find distracting.
It should be noted that recently, Gerg Yaitanes, producer of the television show House, announced that their season finale this year was shot with the Canon 5D, which is essentially the bigger-brother to the T2i we’ve used, the Canon 5D MkII. Here’s a link to an interesting interview/podcast with House cinematographer Gale Tattersall.
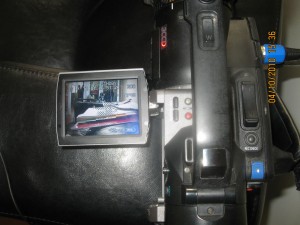
A Panasonic DVX-100a camera was used as our audio recorder. As you can see, we recorded some bizarre footage throughout the shoot.
The biggest disadvantage to filming with a DSLR camera is its poor audio. Despite the input for an external mic, audio can not be monitored nor adjusted manually. Therefore a separate device is needed for recording audio. We used my Panasonic DVX-100a miniDV camera as a sound recording device.
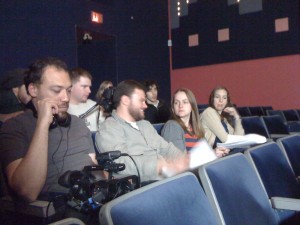
(L-R) Sound recordist Brendon Smith monitoring sound on the DVX, director/cinematographer Jason Leaver, actor Will Conlon, key grip Josh Ary, actress Kate Conway, production manager Rebecca Rynsoever. Brendon and Rebecca, while performing their respective duties, also stood in as extras or stand-ins for Nathan and Rose.
This camera has two XLR inputs. In most cases we had a wireless lav mics hidden on actors. The sound and picture are easily synced in post. There was no need for slating or clap sync marks on each take, because the T2i still records audio with its internal mic. Crummy as its audio may be, all I had to do was line up the wave forms of the T2i audio with the miniDV audio in Adobe Premiere and presto – clean usable sound. Only one lav mic was available on the first weekend of production so a shotgun mic without a proper boom pole was used instead. This shotgun mic isn’t the very directional and unfoundedly it resulted in lot of noise (such as heating systems, traffic, distant music). Consequently, I’m not as happy with the audio quality from the first weekend. But overall I’m happy with the audio and have avoided the need for major additional dialogue recording (ADR).
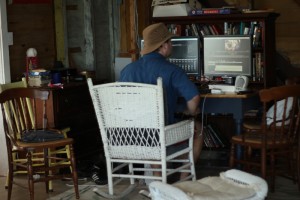
Although normally editing from home, with the deadline of episode two looming the edit suite was brought up to the cottage for the weekend.
||Post-production|Heading|||
Post production is being done at my home edit suite using the Adobe Production suite. Editing is done in Premiere and the effects, colour correction and titling in After Effects. After each production day the footage was transferred to the computer and batched down-converted to standard-def DV-AVI with Adobe Media Encoder. The DV-AVI file format requires far less processing power than the 1920×1080 H.264 Quicktime format that the camera records in. Once editing is completed and picture is locked, the Premiere project is imported into After Effects, DV-AVI clips are replaced by their original H.264 MOV files, then the final high def output will be created from these. I’ll write more about how some off the effects are done in the near future.
||an extra feature|Heading|||
On the most recent day of filming it occurred to us that rather than record the audio with the DVX pointing at nothing, we’d point the camera at something more interesting! Brendan Smith, our sound recordist, filmed us shooting the opening scene of episode two while monitoring sound. When editing, I kept the DVX footage synced with the audio as I worked, so here it is with picture-in-picture. Keep an eye open for the one line of dialogue that had to be recorded after the fact (in my dining room no less). Enjoy!

just wondering what computer you used for editing, and its specs. I really appreciate this post about the production and post production process.